There are many things that make a house feel like home. Loved ones, cozy furniture, big blankets, a cuddly pet, all go a long way to turning your living space into your special sanctuary. But the cherry on top, the thing that can tie the whole package together, is often the items we choose to mount in our walls. Mounting treasured family photos, works of art, statement mirrors and other home décor items can complete a room, and create an environment that feels warm, welcoming, and uniquely you.
But how to mount items properly, can be tricky. You have to balance safety with protecting the walls and structure of your home. But with a little knowledge, the right tools, and a helping hand, you can master the art of mounting any item, anywhere, with confidence.
Mounting on a Sheetrock or Plaster Wall
Tell me about it, Stud.
When mounting into sheetrock, the safest bet is to mount into a stud. The stud provides support and keeps the nail or screw from falling out or sliding down the wall – which sucks.
In my my first apartment, everything was hung by using a nail and a hammer. No regard for safety or how secure it was. The result? A hard slammed door or a bump into the wall caused pictures and mirrors to come crashing down.
Don’t be like me. A little time, a bit of preparation, and you can live your life knowing your precious family photos and fancy decorative mirrors are safe – and staying right where you hung them.
What You’ll need:
- Stud Finder
- Plastic Wall Anchor (Molly)
- Electric Drill with Phillips Head Drill Bit
- Screw
- Phillips head screwdriver
Mounting How-To:
- Identify where you want to hang the item
- Using a Stud Finder, determine if there is a stud in the wall at that location. If yes, you can skip to step 4. If not, continue to the next step.
Note: If you do not have a stud finder, you can locate a stud by tapping on the wall with one finger. Tap along the wall and listen for a hollow then a not hollow sound. If it sounds hollow, there’s no stud. If it sounds like something is in the wall, a more solid sound, there’s likely a stud there. If you’re like me and can hardly tell the difference, invest in a stud finder.
- Grab your drill and make sure there’s a Phillips-head drill bit attached. Place the wall anchor onto the end of the drill bit. Place the anchor + drill on the place you want to mount your item and applying a bit of pressure, drill the anchor into the wall.
- Using your drill, take the screw and drill it into the anchor, or directly into the wall if not using an anchor. Drill the screw until it is in the wall, but not flush with the wall. You want to leave about a 1/8th of an inch space between the screw and the wall (you can adjust the space between the wall and the screw in the next step if needed).
- Hang your item onto the screw. Check to see if level, and flush with the wall.
- To adjust how flush the item is with the wall, adjust the distance the screw is sticking out from the wall with a screwdriver. Screw the screw in closer to the wall, or moving it further out from the wall, depending on the item you’re hanging.
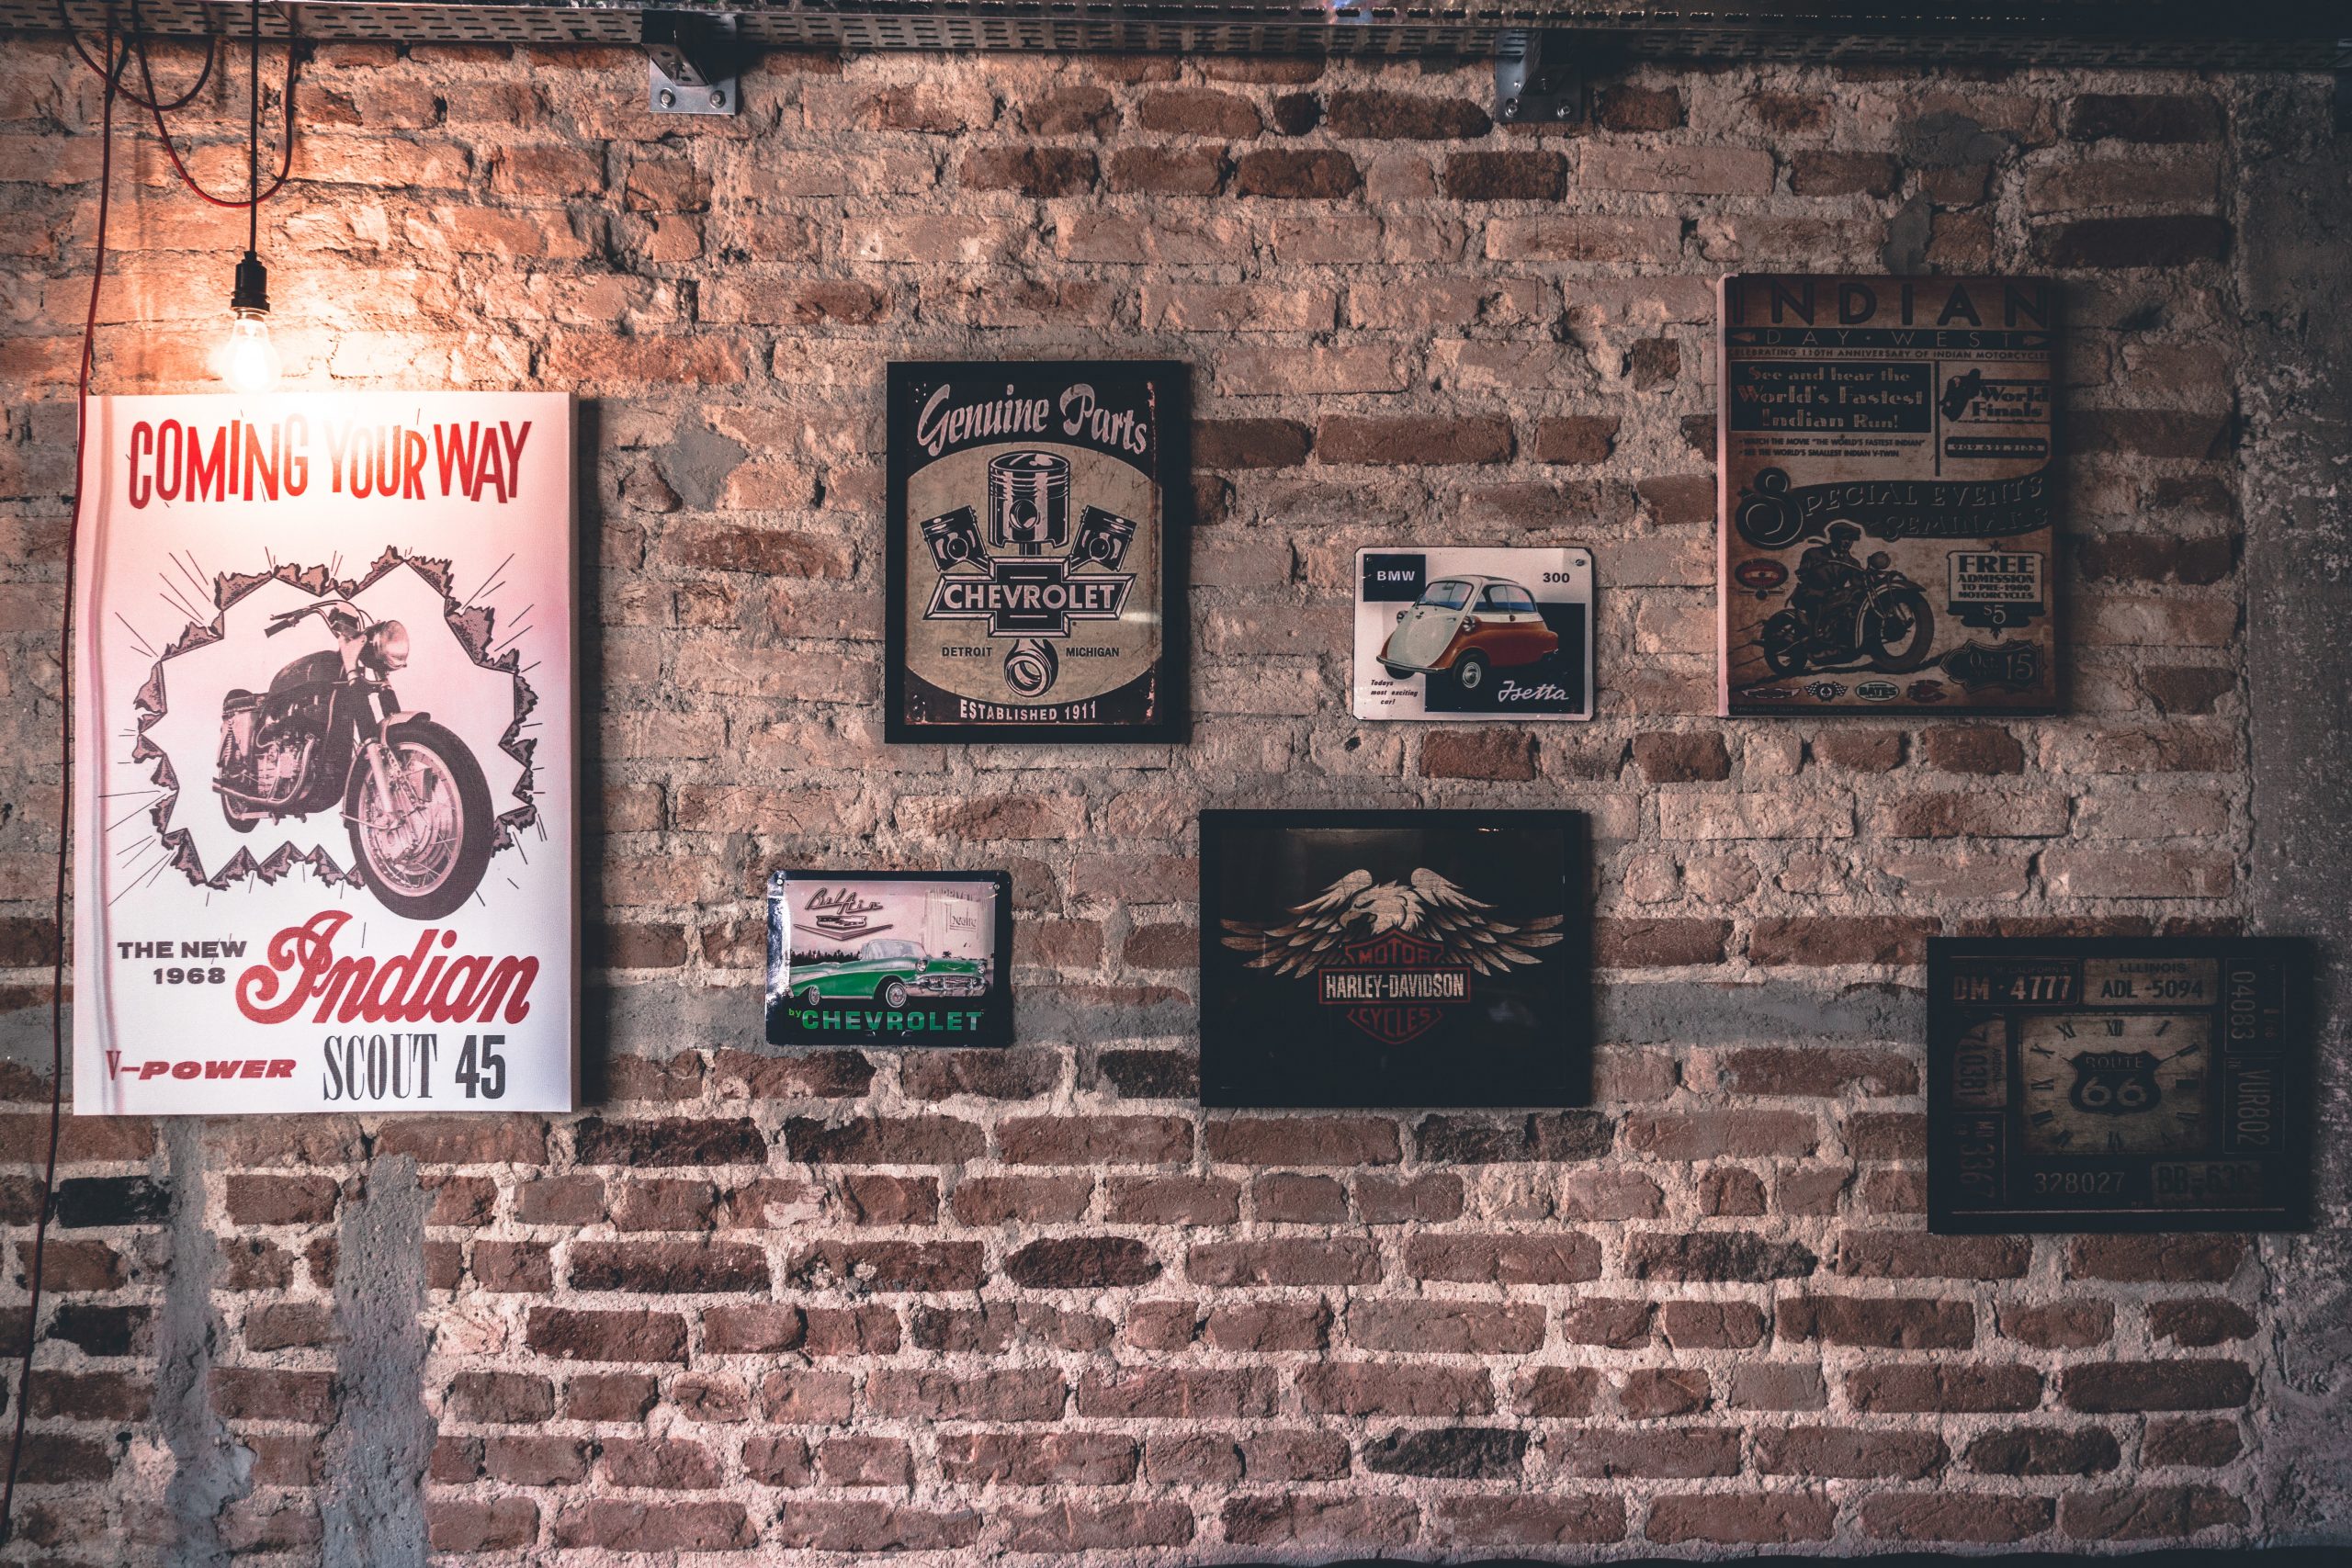
Mounting into Brick
Mounting into a brick surface is intimidating if you’re not sure what to do. But it can be easily done with the right tools and a bit of knowledge.
There are two main methods for mounting on a brick wall. The method you use will depend on the mounting location and the weight of the item you’ll be hanging.
Using Brick Clips
When to use Brick Clips:
- Easier on new style modern brick (uniform shapes and straighter lines make for better mounting grip)
- There is at least 1/8th inch of brick popping out from the mortar line.
- Item hanging is less than 25lbs
- Great for Temporary or Long-Term Hanging Needs
What you’ll need?
A brick clip – purchased at any local home improvement store.
Mounting Hack:
Using brick clips are so easy. Honestly, brick clips take away any worry when it comes to hanging items on brick. They are great for items you want hung year-round, or for items that are up seasonally, like holiday lights and decorations.
- Place the spring-loaded bottom on the bottom edge of the brick, then pull the clip up so that the top end with the teeth can be placed over the top of the brick.
- Give the hook in the middle a quick sharp tug, to make sure you’re clip is secure.
All done! No drilling, no damage, no sweat.
Drilling Into Brick:
Drilling into brick seems scary, but with a little knowledge (that we’re about to give you) and the right tools, you’ll be ready to rock and roll.
You’ll need to drill into brick or the mortar anytime you want to hang anything that weighs over 25 pounds, or if you want it secured more permanently to the wall.
What You’ll Need:
- Electric Drill with a Masonry drill bit
- Walldog Screw (screw and wall anchor in one – available at any hardware store)
- Washer (for securing furniture, tv mounts, or other items that don’t require a hook to the wall)
- Wall Hook (for pictures or other decorative items)
Mounting How-To:
- Using the Masonry drill bit, drill a hole in the mortar where you want to mount or secure the item.
- Clean out the hole. Removing any debris from the hole will make sure you have a secure grip. Blowing air into the hole and wipe away any debris from the outside.
- Place the walldog through the washer.
- Drill the walldog with a washer through the item you are mounting or securing to the brick first.
- Once the walldog and washer are attached to the item you’re securing to the brick wall, line the item up with the hole you created in the mortar, and using your drill, drill the walldog into the brick wall.
Done! So easy, and so secure. That walldog anchor isn’t going anywhere.
Bonus Info: A great benefit of using a walldog screw for mounting in brick, you can remove it just as easily as you put it in. Different anchor styles can be hard, even impossible to remove without damaging larger sections of mortar, leaving you with a big gaping hole or unattractive hardware in your walls. Since the walldog style is a screw and anchor combo, you can remove it by unscrewing it from the wall. It comes out clean and just leaves you with the original hole, no other damage.

Hanging An Item with Two Mounting Points (Hooks, Prongs, or Loops)
Let’s face it – we’re not all great at math. When you’re hanging art or any decorative items in the home, the hardest and most frustrating part of mounting anything is calculating where to put the mounting hardware – without leaving a trail of holes all over the wall.
Before this hack, I hated hanging anything on the wall that had two different hooks. It’s hard enough to find the perfect location for one hook – but add a second hook and make sure everything is level – I start pulling my hair out.
Until I found this…
What You’ll Need:
- Painters or Masking Tape
- Pen or Pencil
- Hammer
- Mounting Hardware
- Level
Mounting Hack:
- Take the masking tape and starting at one mounting point, place the tape over the mounting point and pull the tape across to the other mounting point, and cover that point as well. The result is a straight line of tape covering both mounting points.
- Using a pen or pencil, make a dot on the tape at the center of each mounting point
- Remove the tape and place it on the wall where you want to hang the item. Using a level, make sure the tape line is straight.
- Using the marks you made on the tape in step 2, mount your mounting hardware to the wall using the dots on the tape as your guide. Insert nails directly over the tape.
- Remove the tape and hang your art.

Hanging an Item with a wire hanging line
When trying to hang a picture, mirror, or any decorative item on the wall that has a wire line as the hanging mechanism, it can be tricky to decide where to put the nail. Trying to pull the wire tight, and finding the right spot on the wall can be awkward. And, without this hanging hack, may result in you putting a few holes in the wall before you find the perfect spot.
Avoid the guessing games with this time (and wall) saving hack.
What you’ll need:
- Wooden Ruler
- Nail
- Hammer
Mounting Hack:
- Using a basic wooden ruler, hammer a nail into the bottom inch (or so) of the ruler so the nail is about halfway through the ruler.
- Hook the nail on the ruler onto the wire, and pull it uptight.
- Keeping the wire tight by pulling up on the ruler, place the picture on the wall where you want it hung.
- Press gently but firmly onto the picture in the area where the nail is hooked to the wire so that the nail will leave a light mark on the wall.
- Remove the picture from the wall, and let go of the ruler and nail tool (their job is done). The mark left by the nail is where you’ll need to mount your mounting hardware.
- Using the mark left on the wall as your guide, mount the mounting hardware, and hang your picture.
No guessing, no extra holes. Well done!
Extra Super Mounting Hacks
Because one can never have too many hacks.
Wall Putty To Keep Photos Straight
Having trouble keeping your photos level once hung? Place a small amount of removable wall putty to the corners of your pictures and press lightly to secure them to the wall. No more asking your friends “Is that straight?” and adjusting photos every time a door shuts or the wind blows.
Command Hooks for Seasonal Decorations
Stressing over how to hang holiday decorations can dampen holiday joy – and no one wants that! Command hooks come in different sizes, and come in clear, white to metal finishes. Every command hook has the recommended weight printed on the package, so no need to guess if you have the right one. Command hooks are easy to attach, and stick to almost any surface. They also come off in a flash, and don’t leave behind any sticky residue. Winning!
Toothpaste
Don’t want to leave a mark on the wall? Put a dab of toothpaste on the mounting wire on the back of your picture or artwork, then place the piece firmly against the wall. The toothpaste will leave a small mark on the wall, so you know exactly where to place your nail or screw.
Clothes Pin Holder
Hanging something with a nail – but afraid you’ll hit your fingers with the hammer? Fear no more! Hold the nail with a clothes pin, and with your hand on the other side of the clothes pin, an inch or more away from the nail, you’re in the clear of the hammer and can safely hammer away.
Need an Extra Hand? Call Handyman Network
You’ve got the knowledge – but you still may need an extra hand. That’s where we can help! At Handyman Network, no job is too small. We’re happy to come by to hang your pictures, mirrors, decorative wall art pieces, macramé and oversized tapestries. Whatever you’re style, we’re here to lend a hand. Tell us about your project today, and let’s get it done, together!